Introduction
Most piping failures don’t start at the pump or the valve. They start at the branch point — the tee — where engineers make a quiet assumption that any tee will do the job. It won’t. A tee that’s wrong for the pressure, the fluid, or the connection method turns into a leak point, a pressure drop, or a full system shutdown months after installation.
This guide walks through how to actually choose one: the anatomy of a tee, the types you’ll run into, the materials that matter, and the criteria that separate a fitting that lasts twenty years from one that fails in two. We’ve built and supplied piping components long enough to know where these decisions usually go wrong, and where a little more attention up front saves a lot of trouble later.
By the end, you’ll have a clear framework — not just a list of tee names — for picking the right one every time.
Understanding tee anatomy and terminology
Before comparing types, it helps to get the vocabulary straight, since most sizing confusion comes from mixing up two terms.
Run vs. branch
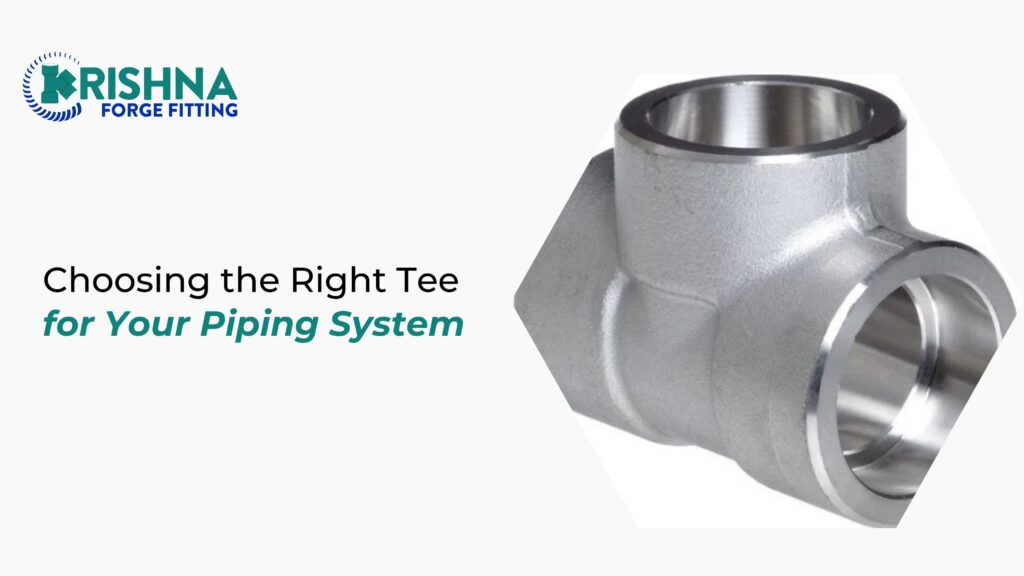
The “run” refers to the two openings sitting in a straight line with each other — if you held one up to your eye, you’d see clean through to the other. The “branch” is the third opening, sitting at a right angle (or, in some designs, 45 degrees) to the run.
Reading tee sizes
Manufacturers write tee dimensions as A x B x C. A and B are the run openings and are interchangeable, since the tee can be flipped. C is always the branch. A 4 x 4 x 2 tee, for example, has a 4-inch run and a 2-inch branch outlet.
Nominal vs. actual size
Every size quoted in the piping world is nominal, not the literal measured diameter. A “2-inch” tee won’t measure exactly 2 inches at any point — this is standard practice across the industry, and it’s worth knowing so you don’t second-guess a fitting that looks slightly off with a tape measure.
Types of tees by configuration
Tees split first by how their outlets are arranged and sized.
Equal (straight) tee
All three openings share the same diameter. This is the workhorse for splitting or merging flow evenly — think radiators fed from a single hot water line, or balanced branch runs in a chemical process.
Reducing tee
One opening is smaller than the other two. Use this when you’re stepping a main line down into a smaller distribution line — a common move in water supply systems where pressure needs to be managed as flow diverts.
Lateral tee
The branch sits at 45 degrees instead of 90. This geometry reduces turbulence and pressure loss, which matters in high-velocity steam or water lines where a sharp right-angle branch would create unnecessary drag.
Barred tee
Fitted with internal bars across the branch opening. Its entire job is to stop pipeline inspection tools (“pigs”) from wandering into a branch line they were never meant to enter — a niche but critical use in long-distance pipeline networks.
Mechanical tee
Used on grooved piping systems. Rather than being welded or threaded inline, it’s clamped around a hole cut directly into the pipe. It’s sized differently too — just pipe diameter and outlet size, with no A x B x C notation.
Types of tees by connection method
Configuration tells you the shape. Connection method tells you how it physically joins the system — and this is where installation cost and long-term reliability diverge sharply.
- Butt weld tee: welded directly into the line for a permanent, high-strength joint. Best suited to high-pressure applications where leak risk has to be as close to zero as possible.
- Socket weld tee: the pipe slots into a socket before welding. This reduces turbulence at the joint and holds up well in high-temperature, high-pressure environments — common in chemical and petrochemical piping.
- Threaded tee: connects via male or female threads, no welding required. Convenient for maintenance since it can be disassembled, but generally rated for lower pressure than welded options.
- Slip/socket tee: pipes slide in and bond with solvent cement, used almost exclusively with PVC and CPVC.
- Push-fit tee: no soldering, no gluing — just push the pipe in. Fast, useful for repairs, but not always suited to sustained high-pressure service.
Material options
The material decision is really a fluid-compatibility decision dressed up as a shopping choice.
Stainless steel (304, 316, 321)
Corrosion-resistant and mechanically strong. Standard choice for water supply, chemical processing, and food-grade lines where contamination and rust are both unacceptable.
Carbon and alloy steel
Common in oil, gas, and power plant piping where the ability to handle high pressure matters more than corrosion resistance alone.
PVC and CPVC
Lightweight, cheap, and immune to rust. PVC handles cold water and irrigation well; CPVC is the version rated for hot water, since standard PVC isn’t built for it.
Copper and brass
The default for hot water lines and traditional residential plumbing, prized for reliability under heat cycling.
PEX
Used with crimp or push-fit systems, valued for flexibility and quick installation in modern residential builds.
Key selection criteria
Once you know the shape, connection, and material options, the actual decision comes down to five checks.
- Match the fluid. Corrosive fluids — acids, seawater — demand higher-grade stainless or specialty alloys, not a default carbon steel part.
- Match the pressure and temperature rating. The tee’s rated pressure needs to equal or exceed the system’s rating, not just come close.
- Check flow and turbulence needs. A lateral tee at a high-velocity point can meaningfully cut pressure loss compared to a 90-degree branch.
- Confirm installation compatibility. Welding, threading, and solvent-cementing each require different tools, skills, and downtime — factor that into the choice, not just the part price.
- Verify standards compliance. Look for tees built to ASTM A403, ASME B16.9, ANSI, or DIN specifications, depending on your project’s requirements.
Here’s a detail that surprises a lot of buyers: sizing mismatch, not material failure, is the single most common reason a tee gets replaced within its first year. Teams tend to over-index on corrosion resistance and under-index on getting the A x B x C notation right the first time — an error that costs far less to fix on paper than after installation.
Applications by industry
Different sectors lean on different tee types by default, shaped by what each system actually needs.
- Water supply and drainage: equal and reducing tees dominate, chosen for balanced flow and corrosion resistance.
- Fire protection and sprinkler systems: tees connect risers to cross mains and branch lines to sprinklers, where reliability under rare, high-stakes use is non-negotiable.
- Oil, gas, and petrochemical: butt weld and socket weld tees in carbon or alloy steel handle the pressure and temperature extremes.
- HVAC, irrigation, and pools: PVC and CPVC tees keep costs down where pressures are moderate and corrosion resistance still matters.
Installation best practices
Getting the right tee is only half the job — installing it correctly is what makes the choice pay off.
Placement and orientation
Align the tee with the direction of flow to minimize turbulence. In drainage lines, the sanitary tee’s sweep needs to point with the flow, not against it, or you’ll get backflow and clogging.
Spacing from bends
Keep tees clear of elbows and other bends. A tee installed too close to a bend restricts flow more than either fitting would on its own.
Common installation mistakes
- Installing a sanitary tee in a pressurized supply line
- Skipping pipe cleaning before soldering or cementing, which weakens adhesion
- Over-tightening metal fittings until the pipe or fitting cracks
- Getting the tee’s orientation wrong in drainage, leading to slow draining or clogs
Maintenance and inspection
A correctly chosen tee still needs periodic attention. Check joints for corrosion, leaks, and integrity — especially at stress points and older connections. Replace anything worn or cracked immediately rather than waiting for a failure to force the issue.
FAQs
What’s the real difference between an equal tee and a reducing tee? An equal tee has three same-size openings and splits or combines flow without changing pipe diameter. A reducing tee has two different sizes, letting you step a main line down into a smaller branch while managing flow rate and pressure loss.
Can I use a threaded tee for a high-pressure line? Generally, no. Threaded tees are convenient for maintenance and disassembly, but they’re typically rated for lower pressure than welded options like socket weld or butt weld tees.
Why does nominal size differ from the actual measured size? Nominal sizing is an industry-wide convention, not a measurement error. A “2-inch” tee is labeled by a standard reference size, not the literal diameter you’d get with a tape measure — this holds true across virtually every pipe fitting, not just tees.
Do I need a lateral tee instead of a standard 90-degree tee? Only if turbulence and pressure loss at the branch point are a real concern — typically in high-velocity steam or water lines. For most standard branch connections, an equal or reducing tee at 90 degrees is sufficient.
How do I know if a tee meets the right standards? Check for compliance markings referencing ASTM A403, ASME B16.9, ANSI, or DIN, depending on your region and industry. A supplier should be able to confirm this documentation on request, not just on the label.
Conclusion
Choosing the right tee comes down to four checks: configuration, connection method, material, and pressure rating. Get those four right, and the fitting disappears into the system, doing its job for decades without a second thought.
At Krishna Forge, we build and supply pipe tees engineered to match the fluid, pressure, and standard your project actually requires — not just the part that fits on paper. If you’re specifying tees for your next project, get in touch with our team for a technical consultation or a quote, and let’s make sure the branch point in your system is the strongest part of it, not the weakest.
